Here is how to make a cheap agility / fitness grid for less than £10...
- What you need is
- Old box made of good quality cardboard
- 12m of Duct tape
- 12 inch (30cm) ruler, it is easier to mark if the ruler width is less than the width of the tape - align it and then just draw around it if you don't need to customise.
- Scissors

- Sizing - The example used is for an average male adult.
- To customise (for a child, taller or shorter person) you need to change the width and height of the grid by basing these measurements on length of their straight leg from hip to floor and adjusting the cardboard strip length to suit.

- Strip length=(Leg length-((Tape width*4)+(Gap width*6)))/3, table in centimetres cm.
Tape Width Gap Width Leg Length Strip Length 50 10 500 80 50 10 800 180 50 10 1100 280 50 10 1220 320
- To customise (for a child, taller or shorter person) you need to change the width and height of the grid by basing these measurements on length of their straight leg from hip to floor and adjusting the cardboard strip length to suit.
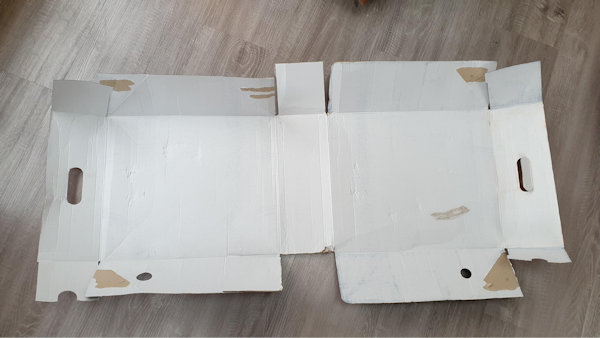
- Deconstruct the box and layout (if corrugated, for extra strength make sure internal corrugated ribs run along the length of the strips to be cut)
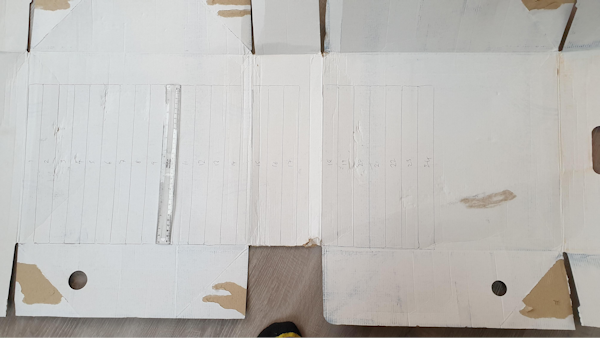
- Use the ruler to mark out 24 strips
- The length should be alright at just over 12" (30cm), but must be narrower than the tape.
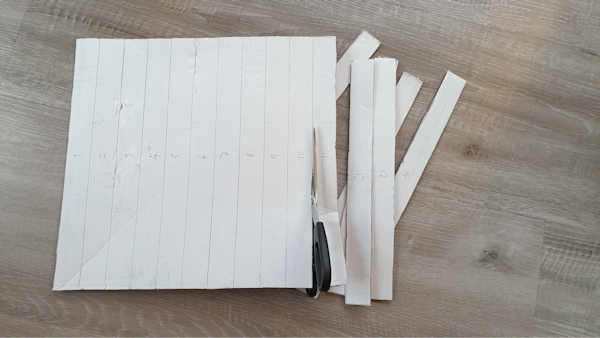
- Cut out the strips.

- Find a space big enough to make the grid in, about 2m square.
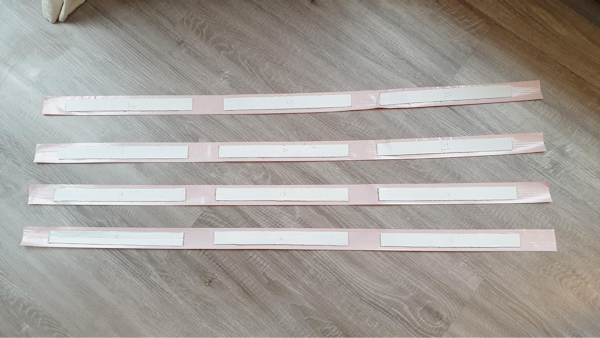
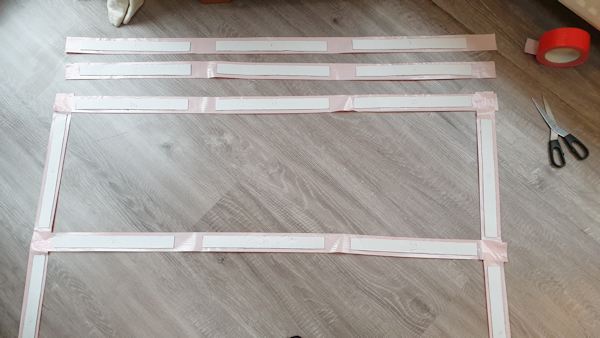
- Make the upside down grid strips
- Layout a strip of dust tape upside down ( sticky side up) at least 1.25m long.
- Place a cardboard strip centrally on the tape about 7cm from the left end. Then another 7cm from the end of the first cardboard strip.
- Then the third 7cm from the end of the second cardboard strip.
- Then make more tapes with strip attached.
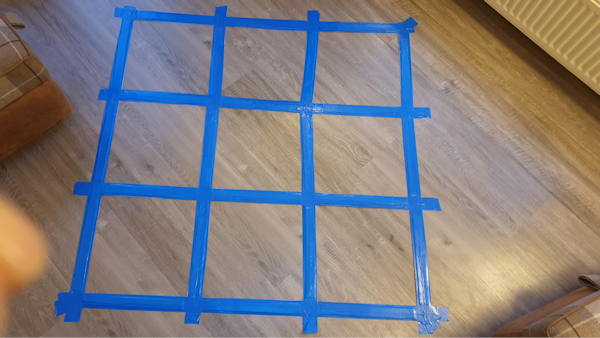
- Form the upside down grid
- Start to form the grid by attaching them together. A delicate process as you only want them to stick where you want them too.
- I carefully lifted them both using their cardboard strips and positioned them so there was approximately 1cm gaps between the cardboard strips and the new tape to be stuck down.
- I also attached the corners to the floor to allow some tension to keep the tape strips taught.
- Make more tape strips and complete the grid.
- Make sure you don't touch, tread, kneel or get clothing stuck to the stick side up grid. An agility exercise in its own right. You just need to be careful, controlled and patient.

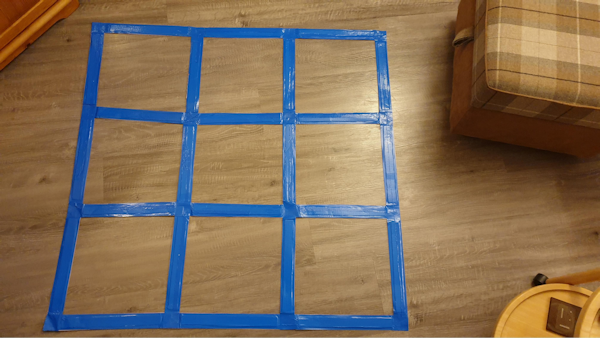
- Overlay
- Attached each side junction to the floor to stabilise the grid
- Accurately overlay with the tape strips with duck tape and firm down.
- Finish the grid.
- Cover over any missed bits with more duct tape.
- Trim off all the excess tape from the junctions.
- Let me know if you have successfully made a grid.
- How to use the grid
- Details and routines to follow.